Editor’s Note: This is the first article in a 3-part series, detailing a basic-level cosmetic smile enhancement using a custom bonding kit as prepared by SmileBOND®.
In 2022, on a worldwide basis, the demand from the public for cosmetic enhancement of all aspects of the human body reached an all-time high.
This bodes well for the astute dental practitioner, as cosmetic dentistry is sought after as well. Further, the desire is based on wants rather than needs.
We know that patients will open their wallets or purses and willingly spend for something they really want. Yet they may wait months or years, or never opt at all, to pay for a service that their dentist tells them they “need.”
Regarding the strong demand for dental enhancement, as reported by Cision PR Newswire in September 2020 (based on research by MarketsandMarkets), the cosmetic dentistry market is expected to grow from $21.9 billion in 2020 to $30.1 billion by 2025. This makes a compound annual growth rate of 6.6% during the forecast period.
Even though the intense demand for cosmetic enhancement might be a boon for dentists, I believe that the industry faces a vexing problem. The problem is that even though millions of potential patients are unhappy with the appearance of their smiles, a disturbing number of them will not proceed with treatment based on traditional options given by dentists.
Intense demand for cosmetic dental enhancement? Patients enduring dissatisfaction with their smiles (sometimes for decades), but not proceeding with treatment recommended by their dentists? Why?
I have found, based on hundreds of consultations, that the 3 main reasons prospective patients will not proceed with current treatment offers are as follows: cost, fear, and time.
- Cost: For well-made, esthetic porcelain crowns and veneers, fees can range from $1000 to $3000 (or more) per unit, depending on the regional location of the practice and the skill and reputation of the dental team. The total cost to restore the upper 8 “smiling teeth” is an insurmountable barrier for many people who would otherwise love to have a cosmetic restoration.
- Fear: Many patients who would love to have their teeth cosmetically enhanced will not proceed due to fear of having their “teeth ground down” to have porcelain crowns and veneers placed. We often hear comments such as, “I don’t want my teeth ground down to pegs,” or “I don’t want stock taken off my teeth” to have the work done. I have consulted with patients who could have afforded any price quoted but would not proceed with any process that would damage their natural tooth structure.
- Time: Although many minor orthodontic corrections may be completed in a span of a few months, often orthodontic procedures take many months or even years to complete. Regardless of the use of aligners or brackets and wires, many patients are unwilling or reluctant to commit to the amount of time needed to level and align the dentition. Additionally, many who require orthodontic correction also have size, shape, color, and wear problems with their smiling teeth. These cases need a phase of restorative correction upon completion of the orthodontics. The combined costs of orthodontic correction plus cosmetic restoration, and treatment time needed, are prohibitive to many.
I estimate that as many as 4 of 5 people seeking help with cosmetic smile enhancement will walk out of the door without booking treatment when presented with traditional offers. An 80% rejection rate represents significant lost revenue, and frustrated, unhappy patients unable to move forward with urgently desired treatment.
The dental industry is focused on products and procedures that many patients are refusing. This has created an asymmetry in the consumer market (excess focus on a small segment of the market) and a vast, overlooked pool of patients earnestly seeking a viable alternative to currently promoted cosmetic enhancement offers.
Fortunately, a process has been developed that meets the objections of cost, fear, and time. It is one that allows long-suffering and highly motivated patients to finally proceed with treatment for cosmetic smile enhancement.
Injection Bonding
Injection bonding (IB) is sometimes referred to as template assisted dentistry or multitooth transfer bonding. For consistency and brevity in this article we will use the term IB.
IB is the transfer of corrected or enhanced tooth forms, from a mocked-up or corrected model of the patient’s teeth, directly onto the patient’s dentition using a custom bonding shell.
SmileBOND Systems (SmileBOND®) is a company that specializes in providing model work-ups and kits for dentists to provide IB for their patients. SmileBOND incorporates its proprietary and patented processes for teaching and training dentists and their teams to perform IB as well as fulfilling orders for treatment kits. All their work-ups and smile designs are created using the company’s trademarked Ideal Natural Form™.
Case Study
Here we present a case that was completed using a SmileBOND kit. This included Shofu Dental products, such as Beautifil Flow Plus flowable composite, BeautiBond bonding agent, and Shofu single-use polishing disks, points, and sanding strips.
A patient, Bailey, presented with a complaint of an “uneven smile” and “spacing” between her upper front, “smiling teeth.” A comprehensive examination was performed, which included radiographs, health history, tooth chart, oral cancer screening, and periodontal probe readings. All findings were within normal limits and no evidence of pathology was found. Bailey’s oral health and oral hygiene were excellent.
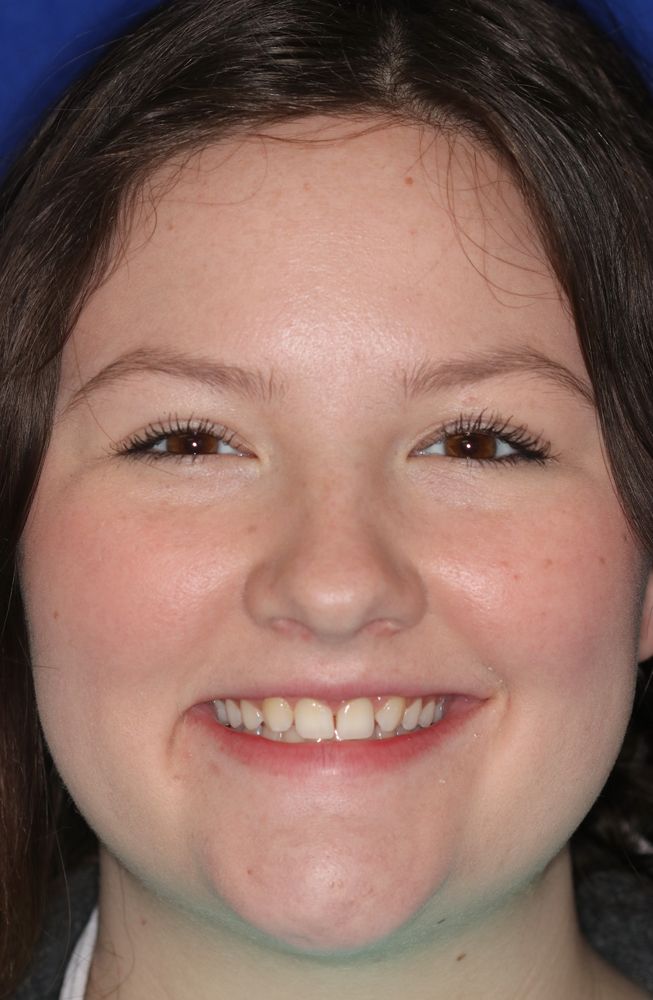
Figure 1. Preoperative full face.
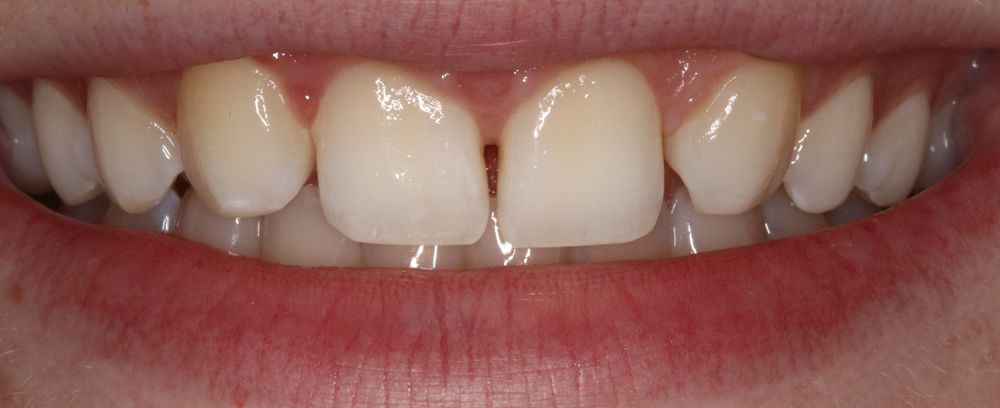
Figure 2. Preoperative closeup.
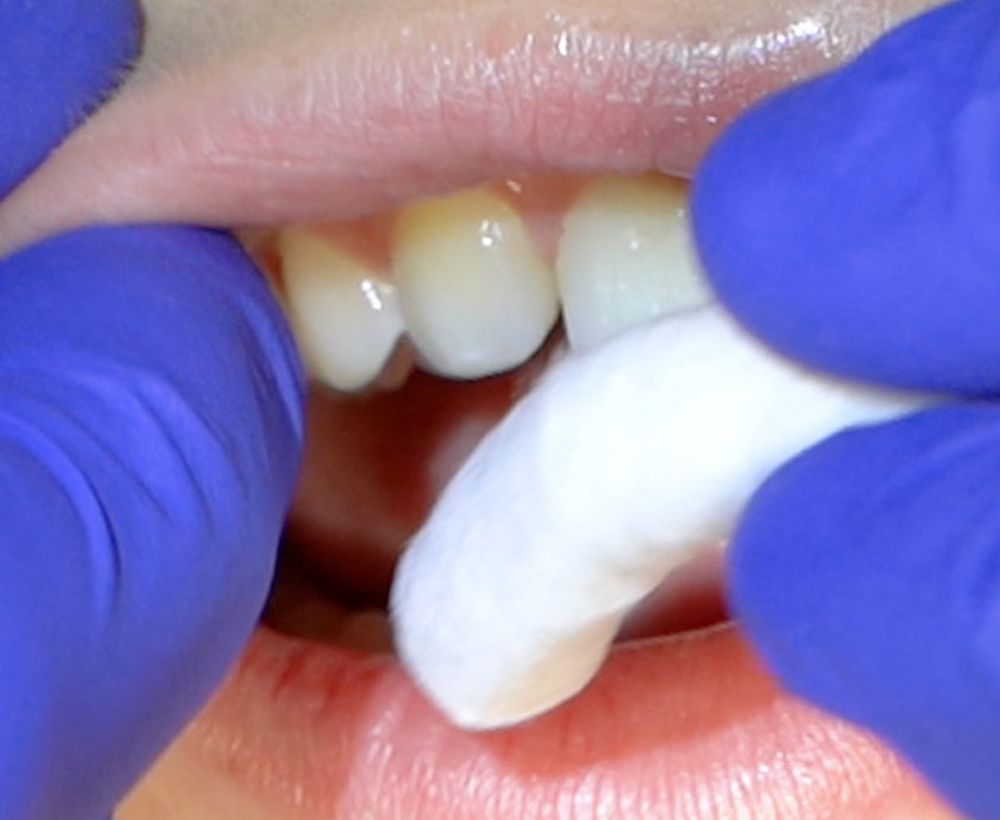
Figure 3. Cotton rolls were used to retract and protect the patient’s upper lip throughout the visit.
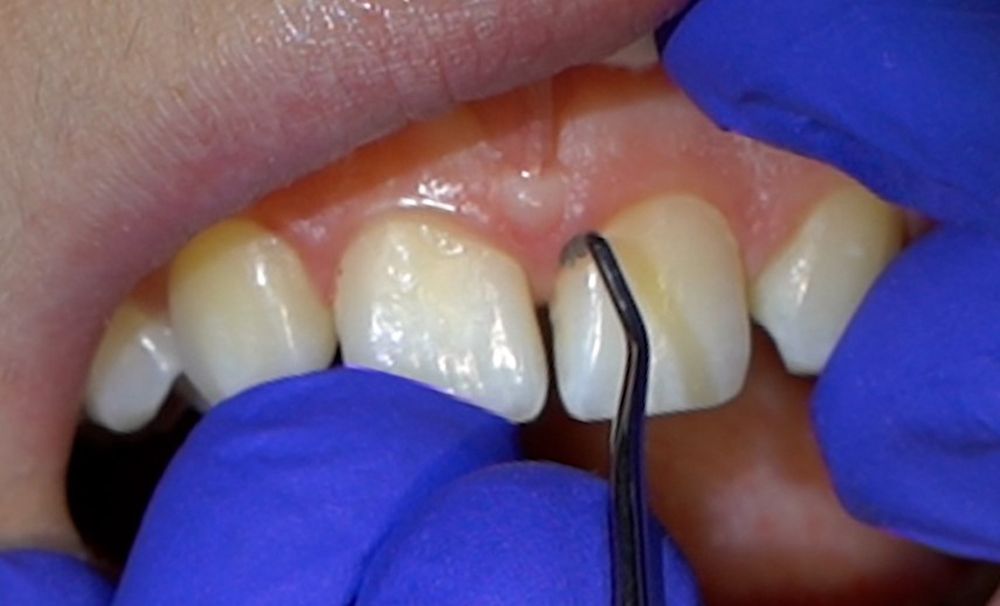
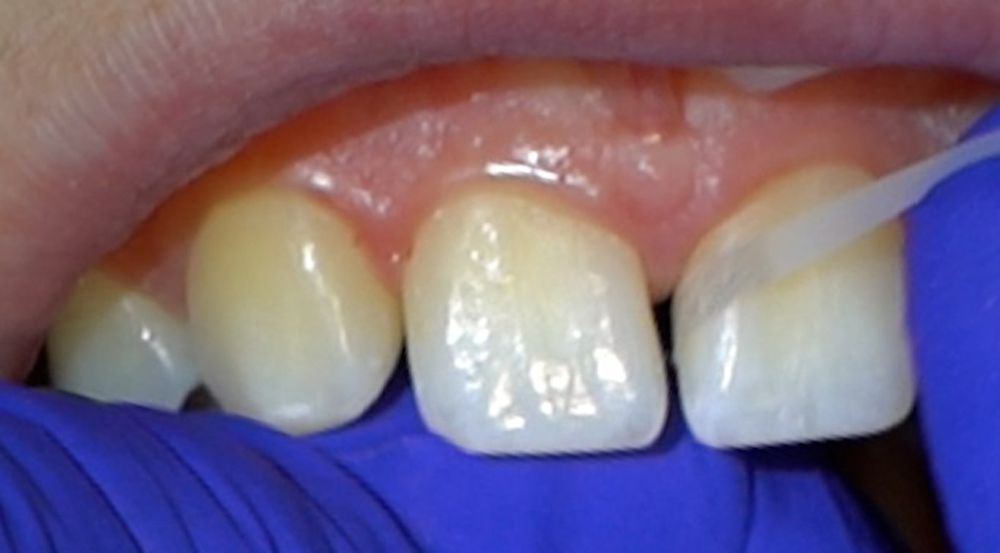
Figure 4. Initial preparation with scalers.
Figure 5. Preparation also included sanding strips.
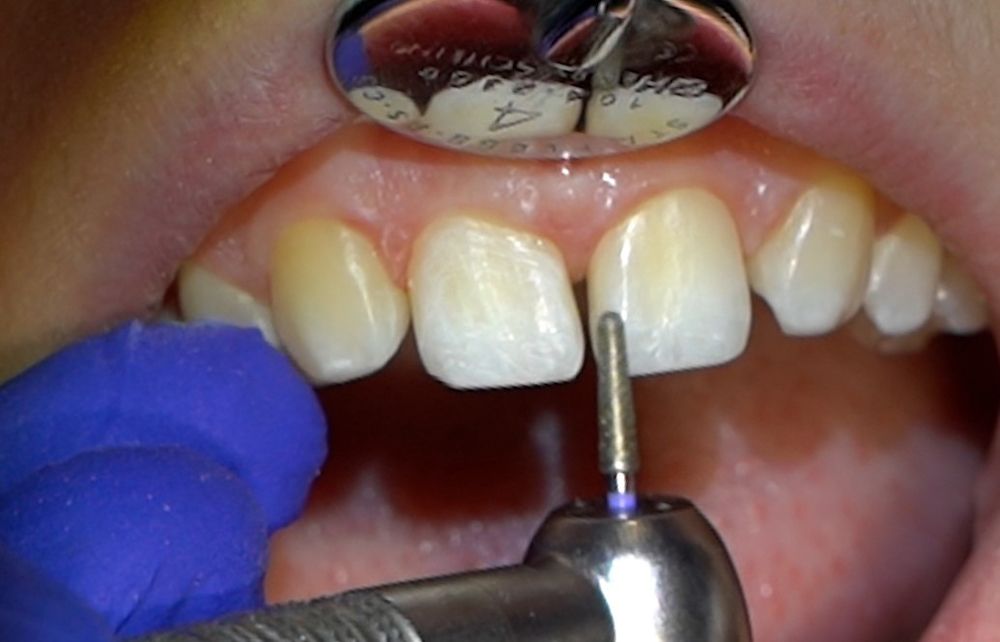
Figure 6. Light prep with coarse diamond bur.
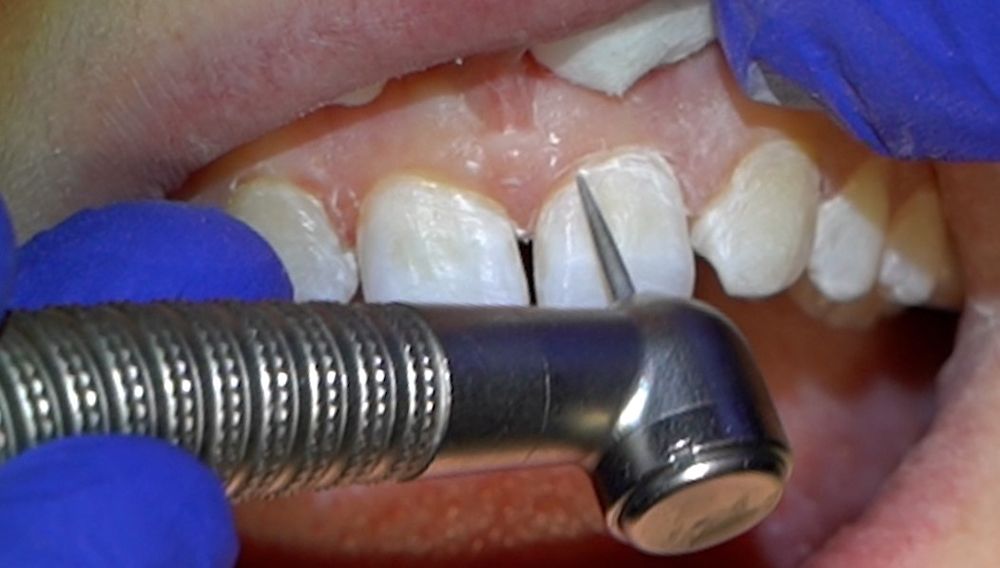
Figure 7. Light prep with thin, tapered diamond bur.
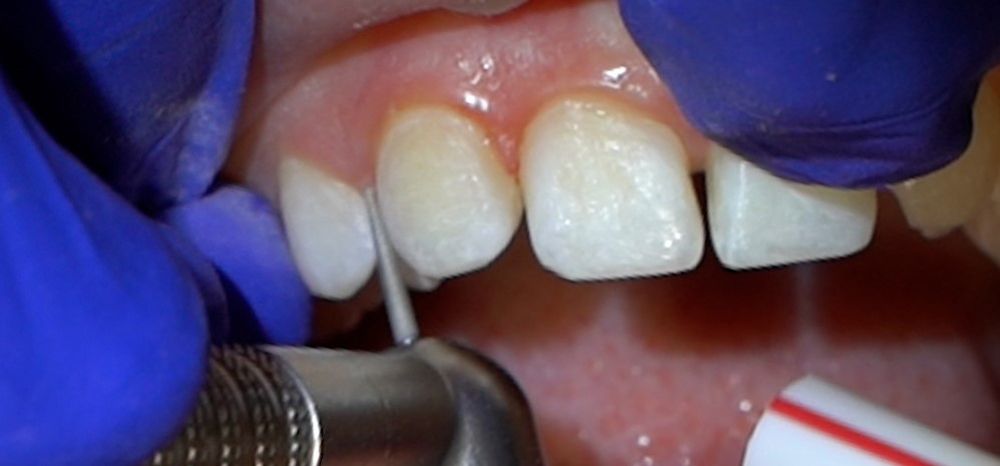
Figure 8. Flattening of the buccal and distal aspects of the cuspids in the lateral spots.
However, she reported that as a child she had orthodontic treatment and was congenitally missing her upper lateral incisors. As was common procedure in some orthodontic practices, her upper cuspids were moved into the open lateral incisor spaces and all posterior teeth moved forward (mesially) resulting in a molar Class II finish. Bailey’s temporomandibular joints were healthy and comfortable, and she had a solid, comfortable bite (the orthodontic work carried out was excellent, and no judgment was made regarding the choice to finish in Class II molar vs holding open the lateral spaces for implants. It may have been determined that the cuspids had drifted mesially and the molars well toward Class II by the start of treatment, and thus the path of least resistance was for a Class II molar/cuspids as laterals finish).
Figures 1 and 2 show Bailey’s preoperative images.
Although the orthodontic result was clinically and occlusally excellent, the esthetic result was less than ideal. Note the bulbous, pointy cuspids (now in the lateral incisor positions), with their naturally deep embrasures. Also note the diastema between the central incisors, which could not be corrected because of arch size discrepancies.
To address Bailey’s chief complaint, we embarked on a detailed discussion about her various treatment options. To enable and obtain her informed consent for treatment, we examined the pros and cons of all available treatment options including the following:
- No treatment, leave things as is
- Further orthodontic treatment, including “stripping” or “interproximal reduction” of lower teeth to allow room for further consolidation of the upper teeth
- Porcelain crowns or veneers
- Freehand composite bonding of teeth 6, 8, 9, and 11 to build out the embrasures of the cuspids and close the diastema between 8 and 9
- IB of a more comprehensive fashion, to enhance the shape and color of the upper smiling teeth
Upon review of the various options, Bailey stated that she was not interested in pursuing any further orthodontic treatment. She was also unable to proceed with any porcelain work, due to the high cost. The idea of having her teeth “ground down” to have porcelain crowns or veneers placed was abhorrent to her.
Figure 9. Etch for first pass.
Figure 10. Isolate for first pass.
Figure 11. Cure bonding agent.
Figure 12. Place shell and inject composite.
Figure 13. Finishing of first pass.
Figure 14. First pass teeth “roughed in” finished.
Figure 15. Injection bonding for second pass.
Figure 16. Beginning of finishing of second pass.
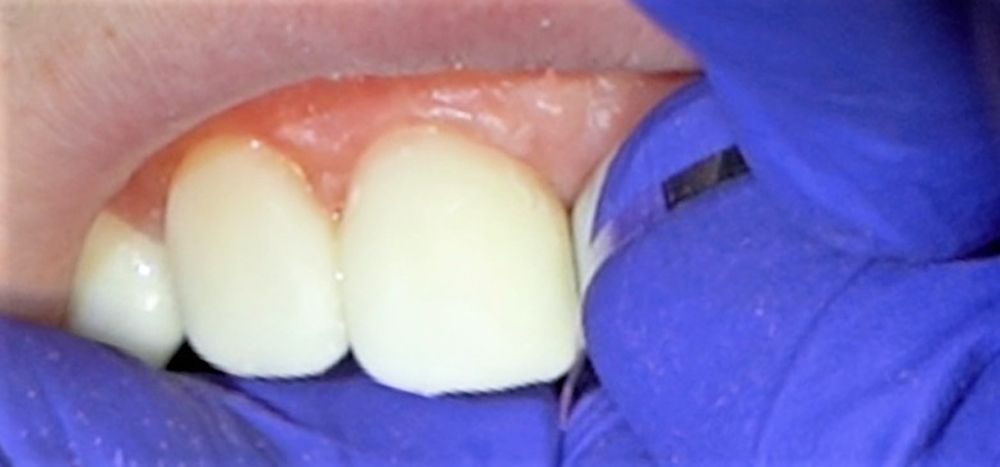
Figure 17. Metal sanding strip.
That left the composite bonding options. She was intrigued with IB because she liked the idea of having a fuller, brighter smile (shape and color enhancements) and that she could see a work-up or mock-up of how her teeth would look prior to any work.
We agreed to begin with initial records, including photographs and alginate impressions to create baseline models for study. Impressions were placed for 2 minutes and removed, then poured up using a vacuum spatulator and agitator and die rock model stone. The records were sent to SmileBOND Lab for work-up and correction to Ideal Natural Form™.
(A conventional wax-up was used for Bailey’s presentation model, but digital enhancement based on scanned models is becoming more popular as a way for patients to visualize end treatment goals.)
Once the work-up was completed and in hand, we invited Bailey back to the office for a “model reveal.” Bailey was thrilled with the work-up. She could not believe her “teeth could look like that,” but we assured her that they could because of the uniquely created SmileBOND custom bonding shell.
She was excited to schedule the work, so we performed a composite color test on teeth 8 and 9. Shofu Beautifil Flow Plus resin was placed on the incisors without etching or bonding agent for ease of visualization and removal after the test. Bailey chose Shofu Beautifil Flow Plus shade BW (cobranded by SmileBOND as “Dazzle”) as her color of choice.
Bailey reviewed and signed a detailed informed consent form, and we scheduled treatment. (In our office, for comprehensive IB work, half the fee is due on scheduling and final payment is collected on the day of treatment before work starts.)
On treatment day, we reviewed the signed consent form, and we shot and confirmed preoperative photographs.
We performed 5 stages of the IB process, as follows:
- Tooth preparation
- Isolation of the teeth
- Bonding
- Finishing (initial)
- Bite check and final polish
(Note: No anesthesia was desired or required for this treatment.)
Treatment Plan
We proposed to add volume, including length and width, to all of Bailey’s smiling teeth. This included 8 teeth in total: 4, 5, 6, 8, 9, 11, 12, and 13 (remember, Nos. 7 and 10 were missing). The diastema between 8 and 9 would be closed, the cuspids would be made to look like laterals, and the first bicuspids would be made to look like cuspids.
Preparation
Cotton rolls were used to retract and protect the patient’s upper lip throughout the visit (Figure 3).
The interproximal tooth surfaces were instrumented with a Jacquette-style scaler and floss. We also used sanding strips to ensure slight roughening of the interproximal enamel for effective etching and bonding. Initial preparation with scalers and sanding strips (Figures 4, 5).
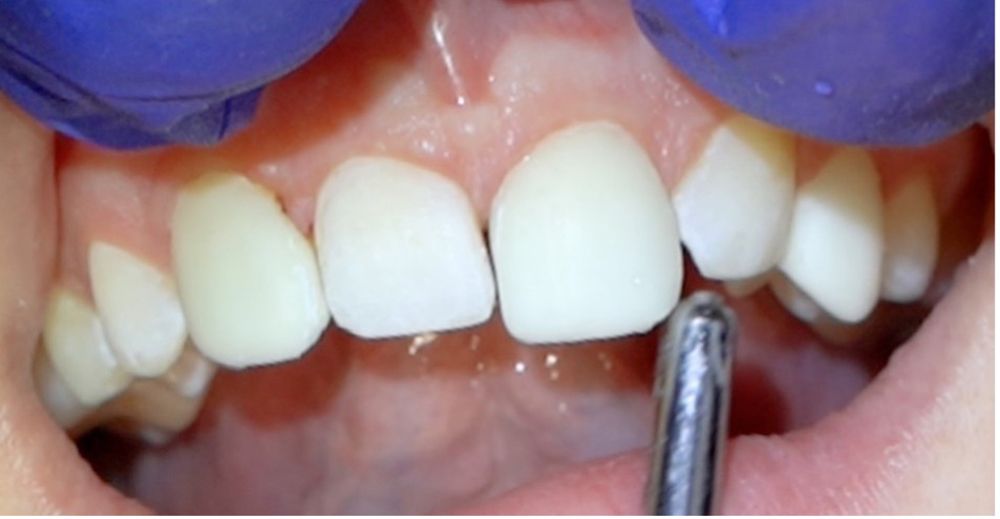
Next, the buccal surfaces of teeth 4, 5, 6, 8, 9, 11, 12, and 13 were lightly “scuffed” with a blunt-nosed coarse diamond bur (835C-1 from Shofu). No amount of enamel was prepped away; the surface was merely roughened lightly for more effective etching and bonding. (Because IB is mainly an additive technique, and composite materials can be precisely feathered to the tooth surface, minimal or no tooth preparation is needed.)
Light prep with a coarse diamond bur (Figure 6). Next, the bur was used to roughen all incisal edges and “rolled-over” to the lingual incisal edges of all the teeth to be restored.
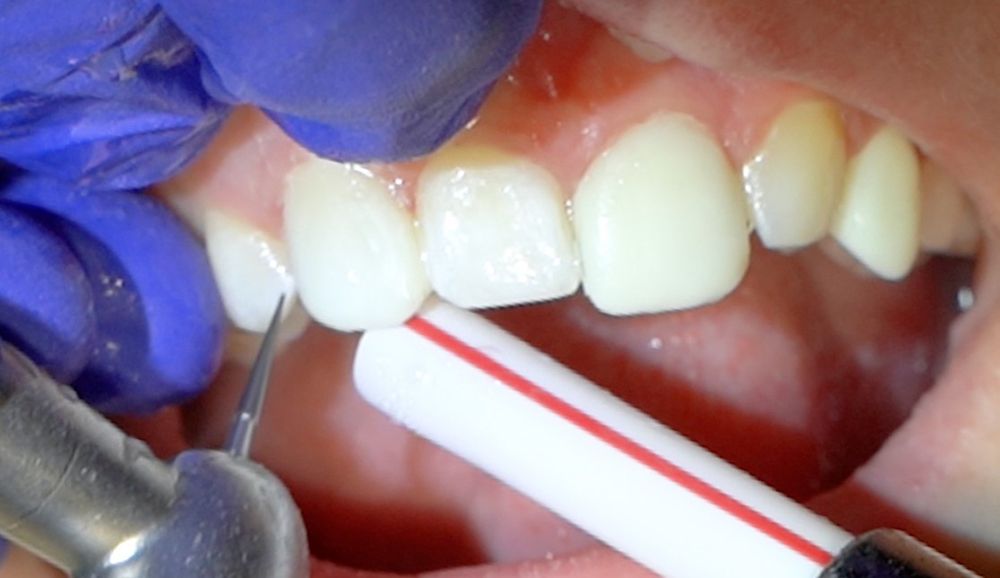
Finally, we used a thin, tapered fine diamond bur to slightly roughen all interproximal embrasures and all “interproximal elbows.” The interproximal elbows are small triangular areas adjacent to the interdental papillae, where the mesial and distal buccal tooth surfaces curve along the gingivae. Restorative material must cover these areas to prevent the appearance of an unsightly “black triangle” at the interdental papillae.
Light prep with the Shofu flame 840-1 thin, tapered diamond bur (Figure 7). In Bailey’s case, as cuspid teeth 6 and 11 were in the lateral incisor spots, it was necessary to perform more than surface roughening as preparation. Because cuspids are much bigger than laterals and have round, bulbous contours, the buccal surfaces of 6 and 11 were slightly flattened and the distal walls slightly disked or straightened so that upon completion, the teeth would look like lateral incisors. This work was done without incident, with light strokes of the diamond bur and water irrigation. No anesthetic was needed.
Flattening of the buccal and distal aspects of the cuspids in the lateral spots (Figure 8). The teeth were bonded in 2 “passes” of alternating teeth, to ensure that no teeth would be bonded together and for ease of postoperative hygiene procedures.
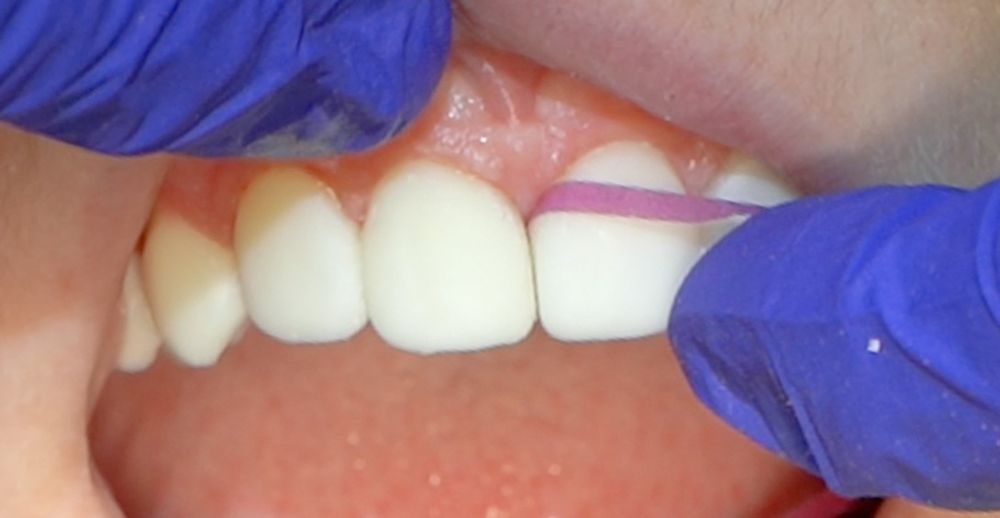
Figure 18. Mylar sanding strip.
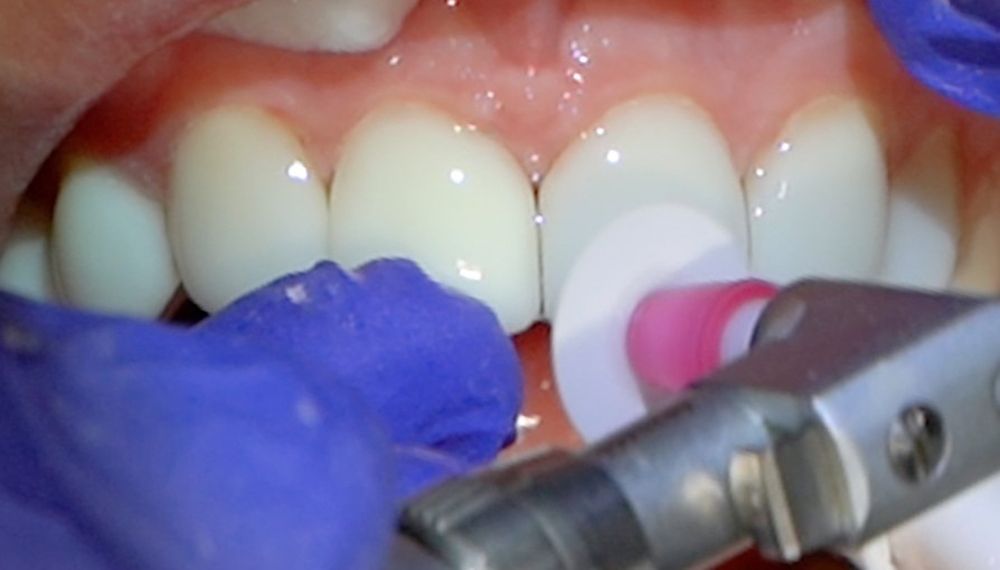
Figure 19. Shofu polishing disks are used (green).
Figure 20. Shofu polishing disks are used (pink).
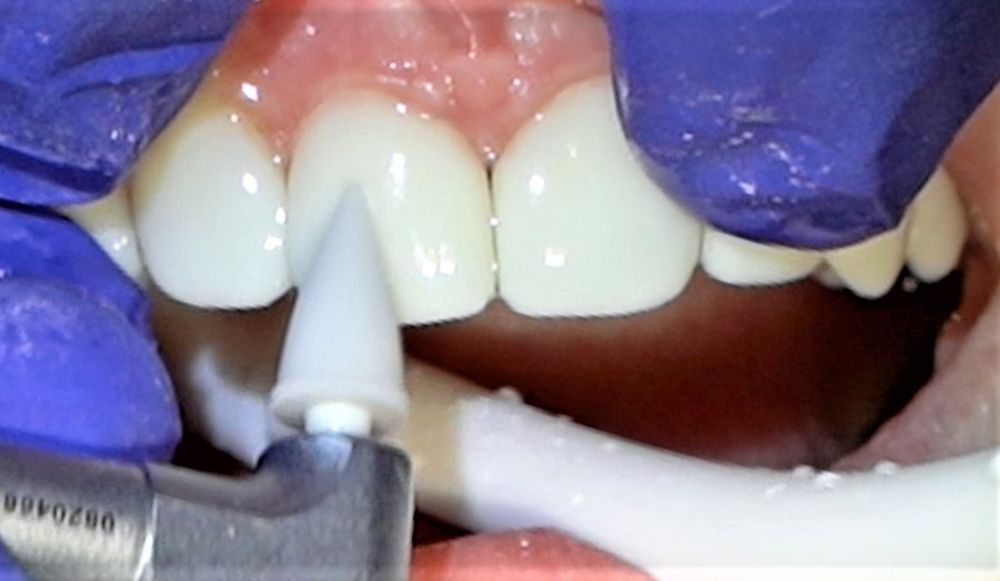
Figure 21. Disks from Shofu help to bring the composite to a beautiful, gleaming finish.
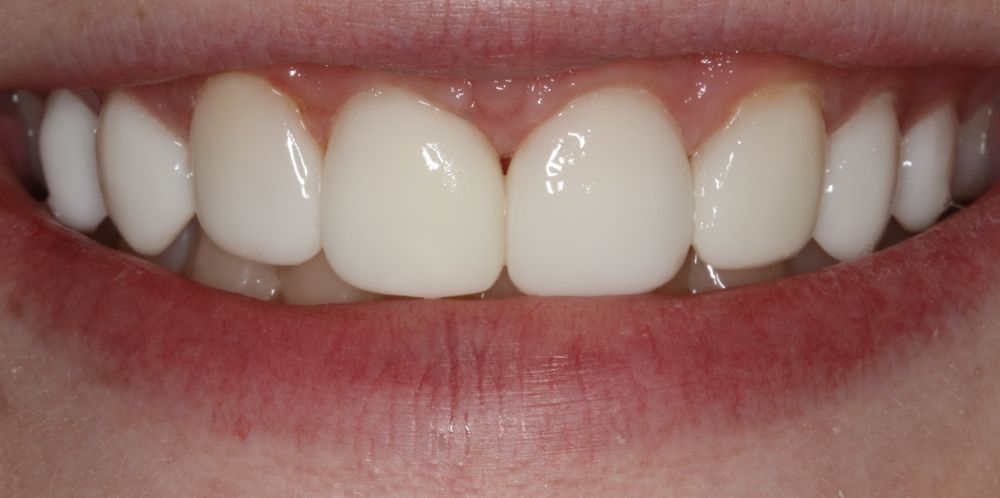
Figure 22. Closeup of completed case.
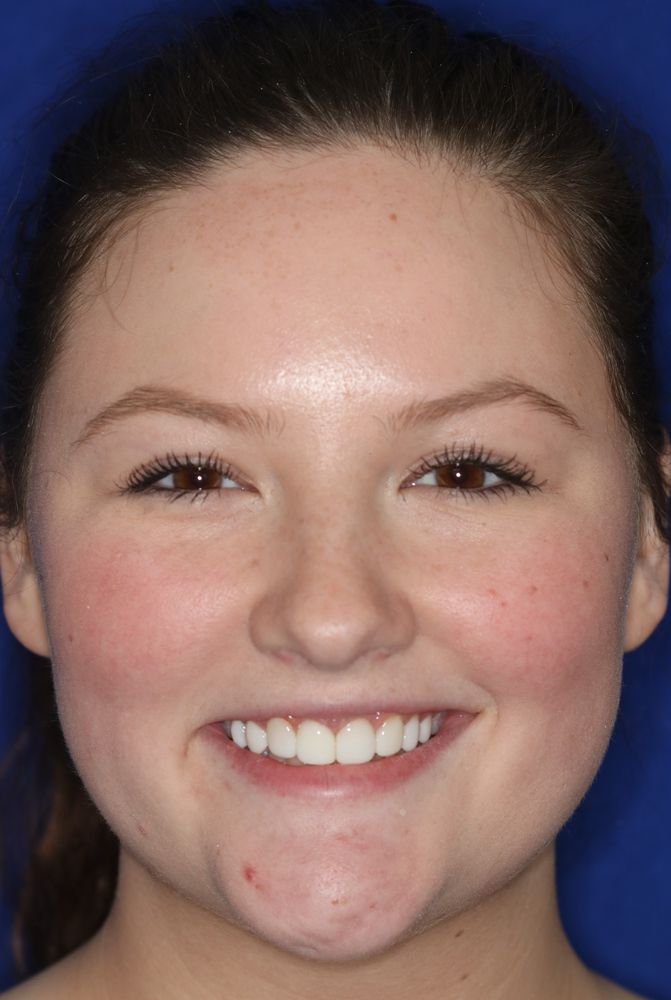
Figure 23. Full face of patient’s completed smile.
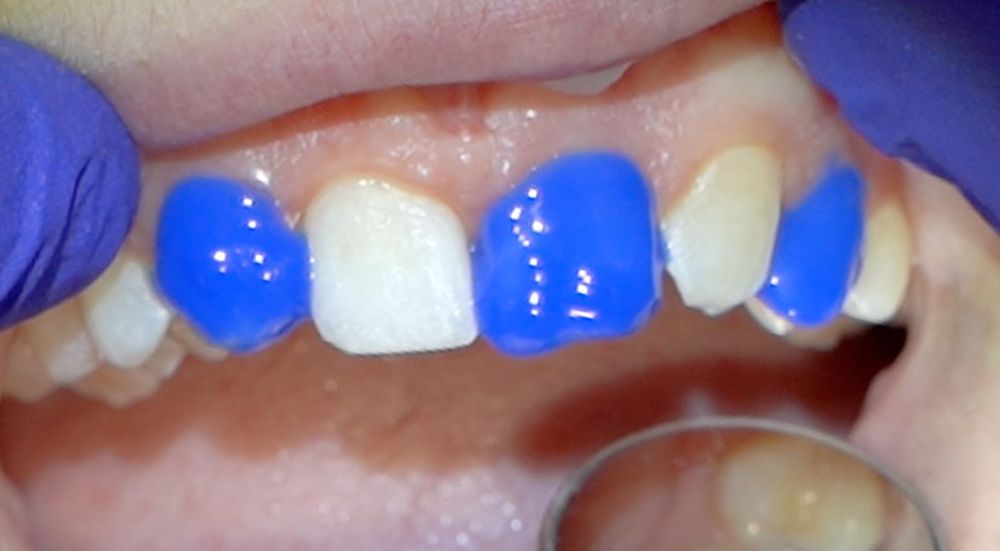
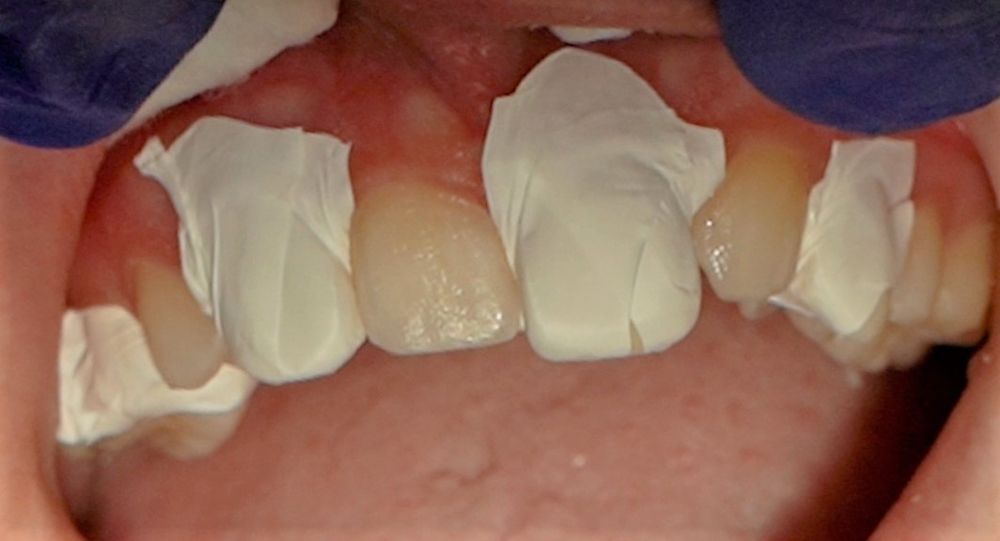
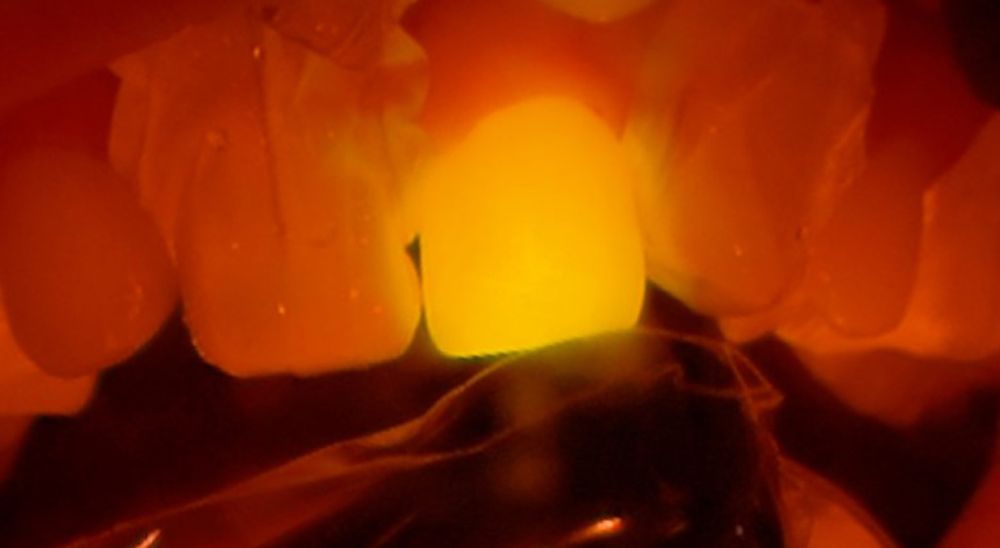
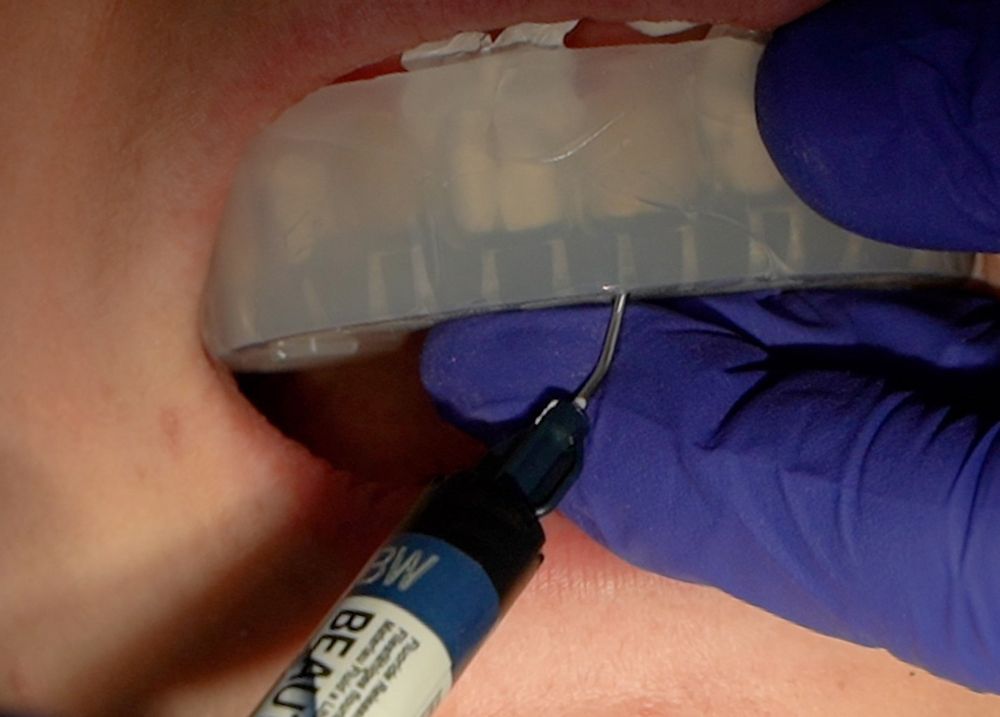
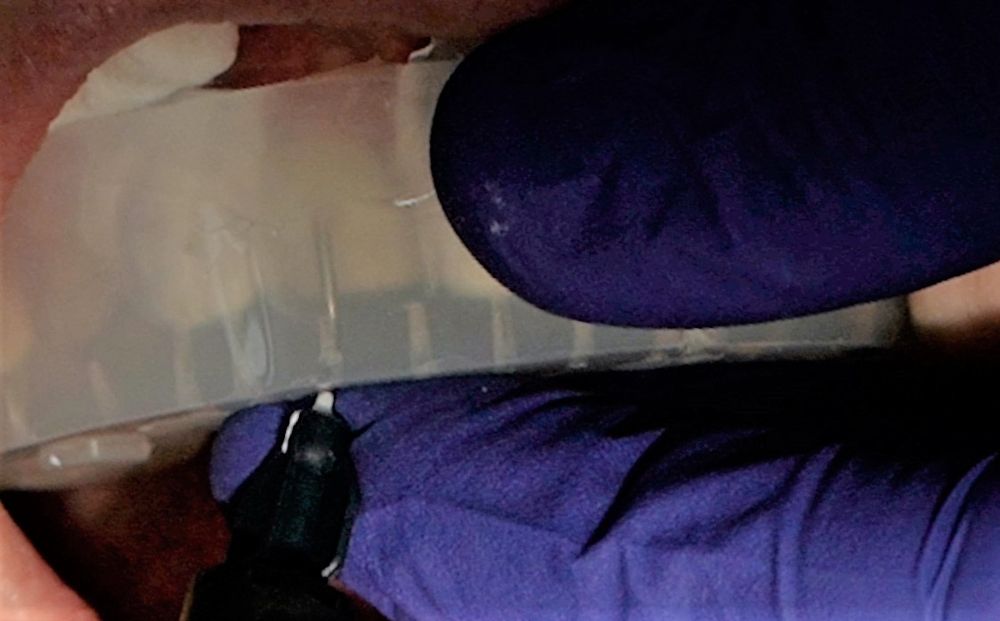
The first pass teeth were etched and rinsed. Bonding agent, BeautiBond, was placed on the first pass bonding teeth, with Teflon® placed over those teeth not being bonded on the first pass. The bonding agent was cured and the custom bonding shell placed. Shofu’s Beautifil Flow Plus BW shade was injected into the shell and cured.
Figure 9 shows etch for “first pass,” followed by isolation for first pass (Figure 10), curing of bonding agent (Figure 11), and then placement of the shell and injection of the composite (Figure 12).
We removed the bonding shell and checked the teeth for voids or incomplete fill areas. The midline was carefully checked. (Here the dentist should stand up and evaluate the midline position from a frontal view, in relation to the patient’s interpupillary line.) Any needed adjustments to the first bonded teeth were made, and the Teflon was removed. Some finishing procedures can be made on the first pass teeth because of ease of access.
Next, the process was repeated for the remainder of the teeth. The second pass bonding teeth were etched and rinsed, and the bonding agent was applied. The teeth bonded on the first pass were isolated with Teflon. The bonding agent was cured, the shell placed firmly, and composite injected into the spaces for the second pass.
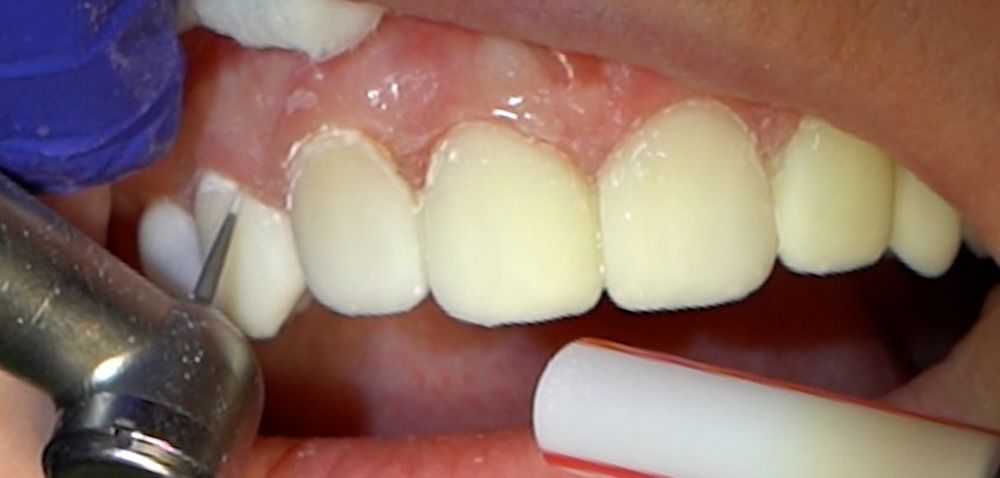
The shell was removed, and final finishing and polishing completed. Note how No. 6 cuspid already looks like a lateral No. 7, and first bicuspid No. 12 looks like a cuspid No. 11 (Figure 13). First pass teeth are “roughed in” and initially finished (Figure 14) and then isolated for second pass. Next, injection bonding for second pass (Figure 15), and beginning of finishing (Figure 16). We carefully used both thin metal and mylar sanding strips to seamlessly blend the interproximal bonding (Figures 17, 18). Then we used Shofu’s polishing points and disks to bring the composite to a beautiful finish (Figures 19- 21).
Final Result
Bailey’s case demonstrates the versatility of IB in situations where conventional dental treatments are not possible or desired. Figures 22 and 23 are closeup and full-face after views.
With a 20-year history of successful treatments, I am confident about the durability of IB restorations. After years of use, polishing and minor repairs of bonded restorations may be easily completed. IB patients seen on routine recall visits are questioned about their experience and are uniformly enthusiastic and grateful.
For questions about IB or training programs, contact the author at: 833-688-0020 or info@smilebond.com.


 Download Issue: Dental Products Report May 2023

